Wednesday, November 18, 2009

Christmas Tree Reveal!

It is time! I have finally gotten pictures taken and up of my Christmas Tree. I absolutely LOVE my tree but I have to give a disclaimer.... Nothing looks as good in the pictures as it does in person. I have one word that describes my Christmas.... GLITTER!! Everything has glitter on it so it makes it hard for it to take great pictures. With that said, you can still see why I love my tree.
I have chosen a bit of non traditional colors with my orange and chocolate choices, but I still definitely have the traditional green, red and gold in there.

I love the skirt! It is just a big thing of sheer fabric bunched up and wrapped around.

So I have to tell you my funny story with this tree.... James and I had been married probably 4 or 5 years before we got a tree. James decided that the year we bought our first house, he would surprise me with a Christmas tree. He ordered it online, and when it came it had multicolored lights on it instead of white lights!
I spent an ENTIRE day undoing all of the little plastic things that hold pre-lit lights on and re-stranding white lights. It totally stunk but I was just grateful that he surprised me with a tree :)

This tree will end up as our "Charlie Brown Tree" (that is what I call trees that have homemade ornaments or your kids ornaments on it... I don't mean it in a rude way), and will get a fuller tree for "my" Christmas Tree.

Something that I think people don't think about much when decorating their tree is the topper. This is something that is huge to me and it can totally take your tree to that next level.
Now my topper may be to much for some people, but I love how full and colorful it is and it makes me smile just looking at it.

I also do a really cool topper for my mom's tree that I use a HUGE ribbon/fabric piece and great a fun topper with some stuff kind of like mine in it also.

So here are some steps that I take to do my tree.

I ALWAYS start the decorating process with the ribbons, beads, etc.
This year I found this gold snowflake ribbon in my ribbon drawer and decided to pull it out and try it on my tree. I don't know why I didn't think of it earlier, but I absolutely love it on there.
I also use this tulle type gauzey fabric. I bought this just like this, but I thought if you wanted something like this for your tree, you could go to Walmart and buy some tulle for $.97 a yard in whatever color, cut it into strips and spray paint a little bit of gold on it to give it a shimmer. SO CHEAP and easy.


Here it is with just the ribbons on it. I have 4 different strand items on here, you don't have to use that many, I just like the variety.

The next step would be to take your larger ornaments and start with them towards the bottom and work your way up. The larger the ornament, the closer to the bottom it should be. That helps with the weight/balance of the tree.

Remember the Dollar Store ornaments I purchased?
Well this green snowflake is one of them as well as the stick thingy coming out right next to it. I told you that you wouldn't even notice my Dollar Store finds next to my more expensive ones!

Do you just find ornaments in the store as they are and just put those on the trees? Why not try putting things a little bit out of the ordinary!

Here I picked up some of these cool stick thingys! They are WAY awesome looking and they are so fun.
On the left of the picture, you can see it in the tree. When I use sticks like this in the tree, I stick them in UPWARDS and not downwards. I want them to fall with the tree, not against the tree. If it is a topper, then I will put them in more downward obviously.

This fun drapey stick.....
was the base of my topper and adds so much movement and sparkle to the tree.

I have so many fun ornaments on here but of course I can't sit and go over all of them.... that wouldn't be very interesting anyway.

If you notice carefully, the bottom third of my tree doesn't really have ornaments on it. My 14 month old daughter isn't making it very easy to get the Christmas stuff out this year.... BUT, I will show you in my next Christmas post what I did with the ornaments that were supposed to be on the bottom. They didn't go to waste and I love what I was able to create with them.


Monday, November 16, 2009

Tip Of The Week - Hanging Stockings

Picture from HGTV.com

How many of you are thinking of getting your Christmas out already? Or how many of you already have? (like me)!

I am in the process of getting my stuff out and decorated and I am always looking for some new ideas. But how many of you have the same dilemma that I have every Christmas, we don't have a fireplace to hang the stockings?

In my last house, I had a shelf (same idea as this picture from the net) that acted as the perfect faux fireplace mantel and that is where I hung my stockings. Well this year in my new house, I have that same shelf hanging in my living room this time and it would work great to hang my stockings, but I have a 15 month old child in the house this time..... if you are a mom, you see the problem.... the stockings would be hanging within reach of my daughter to pull on them. Not a safe choice to go with. I have decided to do something else with that shelf for Christmas (which I will show you when I get my laptop back from my husband to upload pictures.. he's on a business trip with it)
But now I am trying to think of a way that I can hang some stockings.... I had the thought of hanging them from the curtain rods and just having them be part of the window treatment... the problem with that idea... I don't have window treatments in my living room yet so there is no rod to hang them from..... so I need something else to resort to this year...

Here are some ideas that I pulled from the internet


If you have the right kind of house, hanging them on the stairs is a great idea! It doesn't work in my house all to well, but I love the idea none the less.


I loved this idea, having a stand that you can hang the stockings on and then you can put it anywhere. If you have something around the house like this, that would be awesome!


Now here is an idea that is an alternative to stockings! I thought the mugs were a cute idea and something fresh to add to the mix. The only problem... you can't fit as much candy inside :)


Now here is something that I think is a great idea.... creating your own wall hook to hang the stockings from. This is such a creative idea... I am wondering if I can create anything like this somewhere in the house.
My only thing is trying to hang the pole without creating damage to my walls.... I hate making new holes in my walls when I won't have something there at all times.

I am still going to have to toy with some ideas and figure something out, as well as get new stockings this year (don't have any for my girls).

I hope this helps give you ideas if you don't have a traditional fireplace setting. And try something new this year with your Christmas design... don't do EVERYTHING the same as you did last year!

Friday, November 13, 2009

Questions & Answers

*Do you have some tips on how to make your home flow?

This is a question that I was asked of my good friend Melinda and even though I sent her an email with the answer, I thought it would be a good question to post on here in case other people had the same question.

  1. Keep the colors through out your home similar in each room - This doesn't mean that your house has to be boring and have only a few colors in it, but if you keep all of the colors in the same tones or hues, than you will create a flow.
Here is an example from my own house;
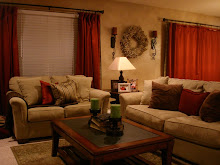
Here is my Living Room: (and yes it still isn't finished, I need more money for this room! :)
But you can see that I have Chocolate Brown, a Golden, Peachy Orange, Red, and Black accents in this room. All very warm colors and on the similar side of the color wheel.

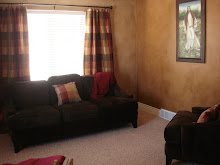
And my Living Room is open to my Family Room:
My Family Room is done in the same warm tones but different colors. Both rooms have red in them, but the red from my Living Room is a bit cooler tone and more of an accent and the red in my Family Room is more of an orange-red and is the dominant color.
I brought Green in the Family Room as an accent along with the same Chocolate Brown and Black.

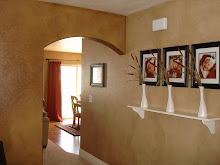
Then my Family Room is pretty much part of the same room as my Kitchen.

The Kitchen is done in the same Red and Tan on the walls as the Family Room and has the same accents of the Green, Chocolate, and Black.
Now here on the right of this picture you can kind of see a black bench ( I haven't gotten to taken pictures of this area yet) but this is where you walk in from the garage. On this black bench I here, I have 2 pillows. These 2 pillows are done in the same Red, Green, and Black, but I decided to add just something a bit more to them and I added Purple. Still completely flows but I threw in just a little surprise with an addition color with the Purple.

My Laundry Room is also just off of here (I am in the process of doing this room so there should be pictures in a few weeks.) But I am painting the walls Green and accenting with the same Red and Black and I am going to bring in a touch of Golden Yellow.

This is the best way that I can explain to keep a flow... Subtly bring in 1 or 2 news colors while keeping a few of the other rooms colors.

*Rules to be broken - So I believe in keeping in with this rule at all times except in the bedrooms or at least the kids bedrooms! I do believe that a kids bedroom should be reflective of them and should have their personality in it so don't keep with your general home colors just to keep the flow. Let their room reflect who they are.

2. Don't paint each individual room entirely a different color as the next - I think it really helps to keep a flow if you have a general color that you use through out your house and then bring in painted accent walls.

By now, everyone knows that I LOVE stained walls! This is the general paint I have used to keep the flow in my home. I didn't care for the basic light tan that was through out my whole house, so I decided to cover it up with stain and it does go through a huge chunk of my home. Every area of the main level has it except for the laundry room. I will have a bit of it on my stairs in a whole wall display/creation I am doing, as well as the office section of my loft area. ( I didn't do my whole upstairs loft area because I don't want to be on a huge ladder on stairs while 7 months pregnant) But I also did my master bedroom as well as I am going to do some in my spare bedroom.
Again, each room has it's own feel and colors (somewhat), but they are all tied together with this staining that I have chosen for my home.
Then of course I have my accent walls through out with the red, green, and even painted stained walls.

If each room is painted a totally different color, it creates a choppy feel and not a smooth transition.

I hope that this gives somewhat of an answer on how to create a flow in your home!

Monday, November 9, 2009

Tip Of The Week - Bedrooms & Bedding

If you are in the market to redo your master bedroom or a bedroom in your home, here is a tip before you get started.

* Always start your bedroom off with picking out your bedding for the room first!

It is so much more difficult to find the bedding you love that will coordinate with a wall color you have already chosen than it is to find bedding that you love and then pick the wall color based off of the bedding you have chosen.

I pulled some pictures from the internet to show some examples of this.
HGTV.com

This picture above is a picture I pulled from hgtv.com. Even though the bedding is a neutral color, you can tell that they designed the room with the bedding in mind first because of the pattern that was created on the red wall. Because the bedding is neutral, they were able to go boldly on the walls and I think it looks great.

PotteryBarn

Here is an example from PotteryBarn that is opposite of the last room. The bedding has some bold color and pattern to it so they opted to go with the white walls. I love that the white walls aren't just plain, bare white walls, they still have texture to it.

phoenixmetro.com

In this bedroom, they did the walls a neutral color that they could have gone with any bedding really, but they coordinated the accessories with the bedding very nicely.

bedzine.com

This wall color is one that you would not take into consideration lightly, but because the bedding was pre-designed and picked out, it goes very nicely with the wall color and the wall color doesn't appear to be scary at all with the bedding chosen.


Restoration Hardware

This rule applies for any bedroom and that also goes for a nursery. In this room, they took the same color as the bedding and put it on the walls, something that you definitely would need the bedding first before choosing.

This is such an easy tip that can save you a lot of headache. Pick the bedding first, then design everything around that.

Bedding can be a very costly item in a bedroom, if you are wanting to redo your bedroom but don't have a lot of money, try searching these websites for some killer deals.

www.amazon.com
www.overstock.com
www.ksl.com (if you are in the Utah area)

These places offer bedding at a discount and you can get some amazing deals. A tip when searching these websites for bedding; Always search for a comforter set or bed-in-a-bag package and here is why. The two options give you most bedding for your buck. You can find a set for $60 sometimes that has a comforter, bedskirt, shams, and a few throw pillows. If you choose a duvet cover, you are usually purchasing all of the pieces individually and the cost ends up higher.

It is possible to design a bedroom on a budget, you just have to be willing to search out the best deals online when it comes to bedding. Other than your furniture, bedding will usually be your most expensive item in the room, but if you search these websites, you can get such a steal on a bedding set.

Wednesday, November 4, 2009

Fun for Kids!

Some of you may already know that not only am I an Interior Designer, but I am also a Mural Artist. (At least I was before I started having kids)

Murals are such a fun thing to incorporate in a room for kids.
They can either be very grand like this Winnie the Pooh Mural I did.
And this Hot Rod flame room I did.
Or they can be something simple like painting a border like I did here.
Or something decorative over a window like here.
This Madagascar Mural is painted in a kids t.v. room and made to look like a framed picture hanging on the wall.
Or, maybe you have a playhouse in your backyard
and the inside could use that fun, special touch.
Or do you have a play area under your stairs that you can make into a fun play house?

There are so many ways that you can incorporate some decorative painting into your kids lives, either big or small. I can't wait to have our basement finished so that we can make the basement into a fun kids area and I can paint one of these murals in my own home.

If you would like to see more mural pictures, check out my mural picture slideshow in the right side column.

Tuesday, November 3, 2009

Tip Of The Week - Drapery Placement

This is a tip that I honestly thought was common sense and after looking at some pictures online this week, I am discovering that it isn't, so I thought I would share.

I wish I had other pictures to show you but I am lacking in the drapery panels in my house at the moment (haven't gotten that far in most of my rooms).

Tip #1 - Drapery Panels should ALWAYS come to the floor!

This is a picture of when I had just made these window treatments in my old house. I am actually doing what we call "puddling" here (where the drapes puddle onto the floor). I guess I didn't realize that people didn't know this, but you should never hang your drapes to high to where they don't at least skim the top of the floor.
Unless you are planning on a flood parading into your home anytime soon, please follow this rule. It is definitely something that can completely ruin a beautiful drape.

Tip #2 - Always hang your drapery panel at least 12"-18" past your window.

The drapery panels in this window are completely functional, they are intended to screen the window and keep the light out.
What you don't see in this picture, is that when these are open, NONE of the drapery is blocking the window (sliding door) so that light can come in entirely.
Here is a perfect picture to show this. The right side of this drapery panel just touches the edge of the window.

People want the most sunlight in their home during the day, and if you hang your drapes in front of the window, you completely lose the light as well as the beautiful picture of a window.

This rule also goes for valances. Hang your valances higher to where they don't come down and cover the window. The only exception to this is if you are hanging it inside of the window frame. If you are doing that, you just need to be careful, each situation is different there.

Like I said before, I wish I had better pictures to show you but I don't want to take people's pictures that I have seen online and post them here of what not to do.... just wouldn' t be kosher.

Monday, November 2, 2009

Christmas Already!

I don't know about you guys, but I am chomping at the bit to get my Christmas decorations up! On Friday I was at the Dollar Store looking for some Kitchen Storage Containers and they didn't have what I was looking for.... so, of course I went wandering around and I fell upon the Christmas decorations section. Normally I would totally be thinking "How great can decorations be at the Dollar Store" right... But holy cow, they have some great stuff there that definitely should not be looked over!

In my last house, my Christmas Tree was in the corner of our Family Room, which means that I technically only needed to decorate half of it. Well this year, I am putting my Christmas Tree in my front window which means I will need all four sides decorated.

A few years ago I went on a shopping rampage for tree decorations at my favorite design wholesale place Taiwan Imports. This is a place that only people of the trade can go to. I bought some gorgeous stuff, and even though I still got them on a great deal, they still cost me a bit of money. Well since I have more tree to decorate this year, I needed some extra decorations to fill in all around and I was excited when I came across these!
They had quite a bit to choose from but these are things that will go great with what I already have for my tree.
I love these gold glitter twirl sticks! I actually got these for my moms tree a few years ago (for more money may I add) and they are so fun in there that I wanted to get them for my tree. These red glitter balls were 12 for $1!!! How can you beat that! I bought all of this for $7 and I guarantee that when you see it all in my Christmas Tree, you won't be able to tell what was from the Dollar Store and what is my nice stuff. I am so excited to get it all out and put together, but I guess I should wait just a few more weeks! :)

If you are needing to add some things to your decorations this year or want something completely new, definitely don't shut out the idea of the Dollar Store. I am amazed at some of the things they carry!
Related Posts with Thumbnails