Showing posts with label Family sign. Show all posts

Friday, January 8, 2010

Making Of - Block FAMILY sign

When I was in Colorado for Thanksgiving, my mother-in-law gave me a kit to make this Block FAMILY sign.
All it is is some 2x4 blocks cut, painted and then some vinyl lettering stuck on. Such a super simple project and can be done for very inexpensive.
I actually worked on this up at my cabin about a month ago. I can't stand just sitting and not getting things done so I decided to take this project up there so I felt like I was accomplishing something.

Here is how I did it.
There are 2 different sizes of blocks that were cut out already. I sanded them down and then I just grabbed some green craft paint that I had already in my stash.
I painted all of the blocks green like I show here on the left block and then I took my sand paper and sanded the edges down like I show on the right.
After they were sanded down, I took an old rag and some leftover wood stain (that was used to satin my walls) and loosely rubbed on the edges and over some main areas of the blocks (I didn't want it to look to uniform, kind of messy if you want to use that term).
After it was all dried (I let it sit a few days) I put the vinyl lettering on that was already cut out when my mother-in-law gave it to me.
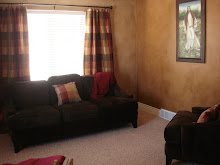
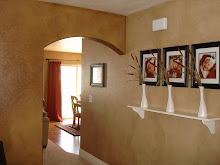
I was originally going to put it in my office since I already had my Family framed sign down in the main living area but when we went to set it out, my daughter ran right for it.

We decided to put it down in the family room anyway on the console table where my daughter can't reach it (yet!)
I really like the extra step of the stain over the paint but you don't have to do that step... it would look good without it, but I am very happy with the way that it turned out...

I hope my mother-in-law likes it too since she could have kept it and put in her own home somewhere....

Thanks Judy!

Thursday, October 15, 2009

Making Of - FAMILY Sign

Remember the small wall from my glazing video? Remember how I said that eventually something would be hanging on that wall? Well I finally put something together and I am so excited to show it to you because of how incredibly INEXPENSIVE it was!!!!

Well Here is what I made!
How to Make:


The first thing I did was go to our local thrift store, Deseret Industries (the DI) and purchase this picture frame for $2.00!
You can see from this picture that it was a bit beat up.... Nothing some spray paint couldn't cover!
I sprayed the frame with this black spray paint.... This kind I got at Walmart for $.97! And I was able to use it for other projects also.
first I printed out the letters on the computer and cut them out...
then I went over them with a black marker on the front and sides..... Spent all of this time getting it all cut out and finished.... Then my husband told me that you can still print on big paper if you create a custom size!

So, after spending all of this time on it, he PRINTED it out for me straight on my paper and saved me the hassle of having to spray glue it down! Wish I would have known that before I spent all the time cutting those things out!
Because my picture frame opening was 16"x6", I needed to go buy some special paper that was big enough. This is art paper and it cost me approximately $2.50. I took the glass out and with my exact o-knife, cut around it.
I took some chalks and a little cotton ball and colored around the edges to add something to the paper.
I used a light brown, dark brown, red brown, and a red layered on top of each other to create the edges to look like this.
And here it is finished on my wall. This project cost me approximately $5.00 and it is a good size, not a small dinky picture. I am so glad to have something on that wall now and that the empty void isn't staring at me every time I walk into the kitchen.

The nice thing is, you have left over paper and spray paint to use for another project!
Related Posts with Thumbnails