Tuesday, October 20, 2009

Purchasing an Online Consultation

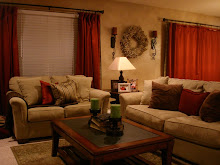
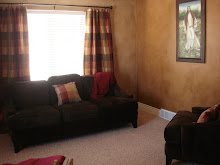
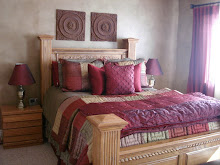
If you are wanting to purchase an online consultation this is what it en tales.

Each consultation is on a per room basis and is $25 per consultation. If you select Online Consultation and Add to Cart, it will take you through a Paypal purchase. Once I have received your purchase, I will email you a questionnaire with the information that I need from you and the list of digital pictures that I will also need from you. If there is any other additional information that I will need from you, you can let me know that with the questionnaire.

I will basically help you with whatever you need help on in that particular room. If you need help picking or changing a paint color, accessory ideas, drapes, pictures, adding details, etc. The list really does go on and on. Let me know what your questions are with that room.

I will take the digital pictures, and based off of what you have given me, I will put together any sketches and pictures and present them to you in an email. If there is something that you are unsure of or aren't quite happy with, let me know and we will change it to what suits you best.

I will not be doing any detailed drawings for any consultation, if you are wanting detailed drawings of a floorplan or elevation, that is a separate purchase.

Please let me know if there is anything that you do not understand with the purchase of a consultation. Thank you for your patience and your input, I have done in home consultations for years, but I am still trying to get the details together for online consultations.

Lindsi Gabler

Monday, October 19, 2009

Making Of - Fall Table Centerpiece

I am not one to really decorate for the Fall or Halloween, I would much rather spend my money on something that is more permanent in my home year round. But I really do love it when people do the seasonal decorating.

I did decide that I wanted to do a centerpiece on my kitchen table that can be used for the Fall and then switch a few things and it can be used for Christmas also ( I do LOVE Christmas decorating).
I had seen this idea back years ago and had wanted to do it, but I am not much of a glass vase type person so I couldn't picture it in my house..... Well, I was on another girl's design blog a little ago and she had this idea on there that she did for her dining table and covered the vases with fabric. BRILLIANT! Why didn't I think of that?

This whole thing cost me less than $25 and I love that I can just switch things out and have new centerpiece for Christmas and I already have the stuff for the Christmas one.

How to Make it-
Start off with any mirror. I bought this one at the DI thrift store for $2.00.
I didn't like the gold frame on it so I spray painted it black with the leftover spray paint from my Family frame project. (Make sure that you tape it off completely before you spray paint so you don't ruin the actual mirror)
After it dried, I took some metallic copper paint I had (I bought at Walmart for $1 something) and rubbed my finger over the raised ornamentation to highlight it. (In this picture, the corner and the side had been done but the top had not)
Then I took 3 vases. I had the large one for the center just sitting around, but I had to buy the two side ones and I got them at Walmart for $2.00 a piece. I also bought the fabric at Walmart for $1.50 a yard. ( I bought 2 yards and I don't even think I used half a yard for these 3 vases but I wanted extra just in case.) Line the edges up and cut it to size


Get some double stick tape and tape it down, roll the fabric around, fold the edge in and tape down and then tape the folded edge over the first edge that was taped down.
I bought some little pumpkins and gourds at Walmart for $.78 a piece (bought 5), 3 beaded candle rings which were $2.99 a piece from Back Home Decor (I am going to do a whole post on Back Home Decor in an upcoming post. These 2 have awesome home accessories for inexpensive that they sell out of their home, that means they can save you money compared to the retailers!), and some fall leaves from the dollar store ( I bought 1 bunch and then just cut it apart with a wire cutter and placed it all around).
I put glass votive holders in each one and purchased 3 votives from the dollar store and lit it all up. Of course the picture doesn't do it justice, it really is a cool little piece and you can see the reflection in the mirror underneath.

So this is my one little thing that is fall that I have in my house. If you would like some other ideas for Halloween or Fall decorating, check out this girl's blog
She has actually made me want to start decorating for Halloween and Fall and I have never really cared about that before.

Friday, October 16, 2009

Online Consultation Giveaway Winner!

I would really like to Thank everyone for helping me spread the word about this blog! Even if you don't need a personal consultation with me, I love being able to share the projects and ideas I have with people, and knowing that people are coming here and reading the posts makes me want to do more.

The WINNER of the first Online Consultation Giveaway is....

ANNA STODDARD!!!

Thanks Anna for spreading the word to your friends and family and helping this blog become more known by people.

Please email me so that I have your email address and can get you the information that you will need to move forward with your consultation.

Thursday, October 15, 2009

Making Of - Brooklyn's Ribbon Picture Frames

In Brooklyn's nursery I have 3 picture frames hanging above her crib and here is how I made those.
First I bought these picture frames unfinished at Roberts Crafts. I actually went in there 3 separate times with a 50% off coupon so I could get the discount on each frame. With the discount, they cost me about $4.00 a piece.

The ribbon I purchased at Joann's Fabrics for $3.99 a roll and I needed 2 (with quite a bit left over).
The first step is to paint the base coat which was a red brown color with cheap acrylic paint. Let that dry, then paint over it with top color which was a pink color that I created with a pink, grey, and white acrylic paint.

After that has dried, take a very fine sand paper and lightly rub on the edges and in various spots on the front to wear the pink off and show the bottom layer of the brown through.
When those have dried, take the ribbon and measure in your desired spot on the back of the frame, angle each side inward and staple in place.

To do the 2nd and 3rd frames, I laid them over the first frame so that I could get the angle exactly the same on each one.
I tied the bows, making sure they were the same length, and hung them up on nails. Once again, this was such a cheap way to make a big impact and focal point in this nursery and I love how it turned out!

LAST DAY for GIVEAWAY

Today is the last day for the GIVEAWAY, so tell your friends and family and have them leave your name in the comments section!

HURRY, HURRY..... Don't Delay

Making Of - FAMILY Sign

Remember the small wall from my glazing video? Remember how I said that eventually something would be hanging on that wall? Well I finally put something together and I am so excited to show it to you because of how incredibly INEXPENSIVE it was!!!!

Well Here is what I made!
How to Make:


The first thing I did was go to our local thrift store, Deseret Industries (the DI) and purchase this picture frame for $2.00!
You can see from this picture that it was a bit beat up.... Nothing some spray paint couldn't cover!
I sprayed the frame with this black spray paint.... This kind I got at Walmart for $.97! And I was able to use it for other projects also.
first I printed out the letters on the computer and cut them out...
then I went over them with a black marker on the front and sides..... Spent all of this time getting it all cut out and finished.... Then my husband told me that you can still print on big paper if you create a custom size!

So, after spending all of this time on it, he PRINTED it out for me straight on my paper and saved me the hassle of having to spray glue it down! Wish I would have known that before I spent all the time cutting those things out!
Because my picture frame opening was 16"x6", I needed to go buy some special paper that was big enough. This is art paper and it cost me approximately $2.50. I took the glass out and with my exact o-knife, cut around it.
I took some chalks and a little cotton ball and colored around the edges to add something to the paper.
I used a light brown, dark brown, red brown, and a red layered on top of each other to create the edges to look like this.
And here it is finished on my wall. This project cost me approximately $5.00 and it is a good size, not a small dinky picture. I am so glad to have something on that wall now and that the empty void isn't staring at me every time I walk into the kitchen.

The nice thing is, you have left over paper and spray paint to use for another project!

Monday, October 12, 2009

Making Of - Brooklyn's Balloon Shade

I have been asked how I made Brooklyn's balloon shade in her nursery, so I hope I can explain it well enough for everyone to understand. This is such a simple window treatment to make and I think it is such a cute alternative to the standard nursery valance that usually comes with the crib bedding sets.

I did not have my blog started when I made this so I don't have step-by-step pictures.

*The first thing that you need to do is measure your window. My window was pretty much a perfect square window I believe at 47". Since my fabric was only 45" wide, I had to purchase more fabric and lay it lengthwise to fit. I cut 2 separate pieces, one that is on the top above the ribbons, and the main full piece. I wanted it to hang about 2" over on the sides and the bottom to make sure that is blocked out sunlight, so I measured an extra 2" on each side plus an additional 1 1/2" - 2" for the hem on the back. The top piece needs to be an additional 4" for the rod pocket on the very top. The fabric I used was a flannel type fabric, I wanted something that didn't wrinkle terribly when tied it up.

*I wanted my shade lined for black out purposes for naps so I measured the liner 1/2"-1" shorter on each side so that the hem wasn't to bulky when folded back and sewn.
*I bought 2 spools of 12' ribbon and just used one roll for each side.

SEWING
*Take the large bottom piece and lay the liner on the back side of the fabric.
*Take the ribbon off of the spool and fold in half, mark with a pin. Do this to both spools of ribbon.
*On your main fabric, measure in about 12"-14" from the sides and pin the ribbon on the top of fabric at the center point where you pinned earlier.
*Place the smaller fabric (that is the top section) on top of the main fabric and ribbon. (Half of your ribbon should be hanging out the back side.
*Sew straight across.
* Hem the 2 sides and the bottom, folding over about a half an inch and then folding over again so give it a cleaner look. Sew
*After the sides and bottom are sewn, fold the top down a half an inch and then approximately 3"-4" and sew straight across, this will create the pocket for the rod to go through.
*I bought a cheap $5 rod at Walmart, this is just a real skinny one. I knew it would be covered by the cornice box.
This is such a simple project, it probably sounds more difficult than it really is. I hope I explained it alright. In the future when I make treatments, I will either take pictures of the steps, or I will make a video of what I do.
Related Posts with Thumbnails