Showing posts with label painting. Show all posts

Friday, January 29, 2010

Beadboard Process

I have found that this project isn't for the faint hearted. It was so much more work and time consuming than both my husband and I were anticipating but when all said and done, we are both VERY pleased with the results and I think we would do it again !? :)
Here is what we started with. Basic tan walls and a very small bedroom.
I went around the room and taped off just the top section of the room since I was only needing to paint the top of the room with the beadboard covering the bottom half.
I chose this peach color for the top half. The color is called Warming Peach from Sherwin Williams but I had Home Depot mix it in a Behr paint. (did you you know that Home Depot has other companies colors on file and they can just select the color and mix it without having to do an actual color match? I had no idea until they did this color.)
Next we took the 4'x8' panels of beadboard and cut them in half so that they were 4'x4' squares or down to whatever size we needed for each section and glued them down with liquid nails glue and then nail gunned them down to secure them.
Then we took a 5" baseboard and turned it upside down and ran it along the top to finish it off.
Some of the areas didn't butt up perfectly so my husband went in with wood filler and filled in the gaps and used a small nail to create the little grooves to make it look like the rest of the beadboard.
Here at the window sill we had a section that wasn't covered so used wood filler once again to make it look like the beadboard.
Once everything was in place and nail holes were filled, seams were caulked, and wood filler was sanded down, we laid drop cloths and tucked them under the base boards and taped the painted area off. We used this great product that had the tape and this plastic already attached together, well worth the little extra money.
Then we borrowed a spray gun from my husband's best friend and spray painted the beadboard.

We needed to match the color of the existing baseboards & closet doors, so we took a bathroom door into Home Depot & they were able to create a perfect match. I had them mix the paint in a paint-primer in 1 and in a semi-gloss finish so that it is easier to wipe up.
Now, I was taking votes on whether or not I should glaze the beadboard and most people said that they liked the glaze. I was planning on glazing but letting myself just have the baby and wait a while until I could do it right..... but, I have to say that the more I am in there, the more I am falling in love with the solid, classic white look and I don't know if I want to glaze anymore. I think that the glaze would look amazing, but I am starting to think that the classic white look might be a better choice to go with because it is easier to grow with when she gets older. Beadboard is NOT easy to paint unless you have a spray gun so I don't want to repaint it down the road if I get sick of the glazed look.

I think I am going to get the accessories in the room and the window treatments made and then we can see how it all looks together and I will decide them whether I want to glaze or not. As of right now, I am perfectly happy not doing it, I think my husband did an AMAZING job with it and I think it is beautiful just the way it is!

* We have 6" baseboards plus the beadboard which is 4' and then a 5" baseboard turned upside down on the top, making this almost 5' tall. This is taller than your standard chair rail style beadboard. I opted for this height so that it would clear the height of the crib and make a nice backdrop for the crib without cutting into it.

Wednesday, December 30, 2009

Before & After Master Bathroom Painting

So our master bathroom was in some serious need of some TLC!

The towel rod was in the middle of this wall
& when we were moving in it was hanging off on one side and had ripped out part of the wall.
My husband patched it up as you can see in the picture.
The tile isn't straight along the tub due to a really poor tub installation job and has always bothered us.... along with grout all over the wall. We have debated on ways to make this not so noticeable such as trim it off with a small trim, but we decided to paint it and see what it did... I didn't take very good pictures so you can't see how bad it really is...
But here is the after picture.... once again, you can't really see it but it is amazing what the world of difference the paint made.
Here is our "Water Closet". I bought these wreaths for my last house for about $2.50 each and I really like them in here....
But now I love the color in here also.
The color in all of the pictures are looking a bit more orange than it really is. The color is a bit more caramely in person.
We had a towel ring holder here that also ripped out of the wall and my husband had to fix it.
Here is the wall painted.....
And here the towel ring is hung and functional once again.
Excuse the mess as I was just starting to pull everything up and start taping.... (my husband is more embarassed about the mess than I am.... who are we kidding if you let everyone think that our house is spotless all the time!)
Here it is clean and painted! AAAHHH!!! So much nicer!
This kind of shows the crappy grout and tile job...

And in the next picture, the paint pretty much hides all of that!

I am so happy that this is done so that I can enjoy this room once I have my little one in the next 2 weeks! Accessories will come later, I just wanted to show the paint job that we did!

You will hear it from me non-stop on here.... Paint your walls and don't be afraid of color! I love how warm my bathroom feels now and I actually want to just sit in the bathtub now! (my husband has never sat in the tub until we painted the walls... I think it cozied it up for him too!)

Monday, October 5, 2009

Brooklyn's Nursery

I have been wanting to post these pictures forever but I have been waiting for a few things to get hung. Brooklyn's nursery is not a nursery for everyone! Some people may have a difficult time with the dark color that I used, but I love the way that it turned out and I wanted something different and I got it.

INSPIRATION PIECE
Every room should have an inspiration piece (I will go into more detail another time) and this was mine for her nursery. This is a quilt that my step-sister Maria made with her mom. I thought they hit the nail on the head with the colors and fabric that I had to see what I could do to turn it into a room. One thing that I absolutely love that they did was make it a bigger size than a crib. This will be a great little comforter when I turn the crib into a toddler bed.
This wall color probably scares some people out there, but I have so much white and light colors in the room that it doesn't feel closed in at all. This room also gets A LOT of sunlight in it! You know that if my husband was ok with doing it that it isn't a dark feel at all.
This crib was a crib that we found on my trusted KSL classifieds. I bet you can't guess how much I spent on this crib!.......lower........I spent $30 for this crib! It was such a steal. The mattress I bought at Walmart for $40 and the bumper and sheet I bought at Burlington Coat Factory...Bumper-$30 & Sheet-$10.
As many of you know, not only am I an Interior Designer, but I am also a Mural Artist. I don't want to do full on murals in my kids bedrooms, but I want some type of painting in each one. One night I was holding Brooklyn and rocking her when we first moved in and I looked above her crib and it just came to me that I always wanted her to remember that she is a Daughter of God! I decided that I needed to paint it up there so that she can grow up seeing that right there.

These picture frames I LOVE!!! These are ones that I bought unfinished and then painted them myself. I will show you another time how I put this together.
These are window treatments that I made and they are very functional for naps and I love the way they turned out.


This shelf is such a darling shelf. When we moved into this house, my neighbor across the street was moving out of her house. Shortly after we moved in, she had a moving sale going on and we decided to run over. Her house was a model home and had a girl's bedroom all set up... well, she had all boys and didn't have use for the girl's room. She stored all of the girl's stuff and sold it at her moving sale. I got this shelf, brand spanking new, for $5. All of the stuff on both the shelf and the changing table were gifts from people and I haven't quite figured out the best way to display them.
This changing table was another KSL steal! It was purchased separate from the crib but they look like they are a set. I found this for $50 and it is in EXCELLENT condition. I had the changing pad already and I purchased the pad cover for $11 at Burlington Coat Factory. My recliner chair I love and that was a bit more money, but we paid for part of it and then her Grandpa Mark gifted the rest of it to her. It will end up going into Kenidi's nursery when I get that put together and I will find a small chair to put in it's place.
Now these darling little hooks I also got at the moving sale for $1.50 for all 3! I went to go hang them up and my screw heads were to big for the holes on the back so I have to go get new screws.... but they will be hanging on the wall here.
They will eventually hang play clothes I am sure.

Monday, September 28, 2009

Living Room Update

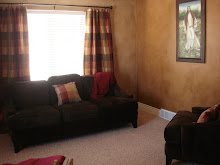
I have been busy working on my living room and I wanted to update you with what I have done so far. I knew in this room that I wanted an accent wall so I needed to start there. I didn't really have anything to go off of for colors so I decided to find the drapes that I liked and go from there. I don't recommend doing this, but I went straight to Target and found the drapes that I wanted (I just bought one for color matching at this point) and drove straight over to Home Depot and picked out my accent color in the store. I got lucky and it worked, but it is definitely better to pick your colors in the room to make sure that the lighting doesn't change the color on you.
Here is the drapery panel and the accent color that I chose to paint. Of course I wasn't just going to stop there! I painted this wall on a Thursday night, let it dry for 2 days, then I glazed (stained) the entire room!
Here is the wall before I glazed......
Here it is after I glazed!
You can see that it isn't a huge difference in color, but the drapes are what tie everything together.
This picture shows how great the wall color looks with the drapes and my Christ picture.
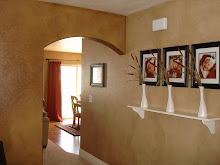
Here is the glaze just over my walls like I have done in the rest of my main level.

So I have to talk about this chair.... I call this my "funny" chair. I found this chair on KSL for $10... yes that is right, $10! I sent my husband to go pick it up and he was a little unsure about it. Anyone who knows me, knows that my style tends to lean more on the clean line side... I consider my style to be Clean Line Traditional, some may consider it Transitional. Anyway, this chair is not what people are used to seeing me pick out. I saw this and thought that I just had to get my hands on it. The fabric is in REALLY great condition considering how old this chair has to be. I think I will keep the fabric on it because it surprisingly goes quite well with the drapes, but the wood color is bothering me. I have decided that I am going to sand the wood down and stain it a dark color. I will put a throw pillow on it and I will have the best, cheapest chair I could have asked for in this spot.

Here is the real color of the fabric, the other pictures had a flash and it made it really shiny looking when it isn't like that in person. Some people may have a hard time having 2 different chairs like I have in this room, that is ok, but it is also ok to mix chairs in a room. I wanted something a little bit different than my usual in this room and I wanted it to be a bit more formal. As you can see, I still have a lot to do in this room, but I am really excited about the direction it is going and I am even more excited about how inexpensive it has been.

Friday, August 28, 2009

Glazing Technique & Faux Finishes

Once you have taken the step to adding color to your walls, why not take the next step and do a faux finish over it? I have posted a few different faux finishes that you could try in your house. All of the pictures don't do any of these techniques justice.

I posted this picture earlier but I wanted to explain how we did it. It is really hard to tell from the picture, but it really is cool in person.
-First we painted the wall with a few coats in red.
-Second, we took a sponge, textured roller and rolled yellow over the wall in straight lines down the wall.
-Third, we put latex gloves on and smeared an orange color around on the wall very speratic.
-Then lastly, we rolled back over everything with the red paint once again. The red doesn't cover completely so the yellow and orange just barely show through and creat this effect.

These next 2 pictures are of my sister's house. She did this Leather technique in her basement and it turned out awesome.
-First she painted the wall a burnt orange color.
- Next, she took some wood stain and painted an 18"x18" square with the stain and then pressed a plastic bag flat against it and then pulled it off. You need to blot the bag where the squares meet so that it doesn't look like a patchwork quilt.

I have had a lot of people wanting to know how I glazed or stained my walls, so I decided to make a video clip of me doing it in my house to show you how. This technique is such a cheap way to make your house look FABULOUS! All it costs is a quart of stain which costs about $7, some painter's tape and cotton rags. One quart of stain can do a whole house or more! It goes a long way so it is definitely worth the little bit of money and elbow grease :)

The video was to large to post straight on the blog, so here is the link to watch it. http://www.youtube.com/watch?v=SYe1H-kI_ys


Related Posts with Thumbnails