Showing posts with label staining. Show all posts

Wednesday, June 16, 2010

You Will NOT believe this......

I have kind of been putting off this post because I am a little embarrassed over this one! A week and a half ago I went and stained my mom's "bonus" room (as we call it). This is her 4th floor... yes that is right, her 4th floor of her house (if you count the basement). Anyway, I am finally getting to posting the pictures and showing you what I did.
Here is the before picture that I have shown you before. Notice the not so lovely wood trim that goes around every... single... set of closet doors.... it was definitely a bit much and an eye sore to say the least.
(this picture is out of place but this is showing the stairs which I will talk about in a minute)

Here is after the trim got all painted by 2 of my brothers, my oldest sister and myself.... and here is one of my little helpers as I was taping for the second layer... isn't she such a doll!
and then mommy's little helper #2! They came up with my while I taped.... I promise they weren't in the room when I started staining.
Now here is the official picture of the room with the fresh coat of white paint on the walls and the trim. Isn't it just a breath of fresh air from the wood trim around the doors? I love it already.....
I am so happy to see the white trim in there..... or should I say I am so happy to NOT only be noticing the dark trim around the doors!

So here is the part that I have been SCARED to show you!!! I got started on the staining and was just finishing the first wall when I went to go move the ladder and.........

OH....... (I don't swear so none of those words came out.... but I was thinking crap)


I dumped almost the ENTIRE qt. of stain on top of me and the carpet!!!! I KNOW!!!

I swear it all happened in slow motion and I just couldn't get to it fast enough. My first thought was to run downstairs and get my mom..... but then I realized that I would get stain ALLOVER her almost white carpet so I stopped myself, then I realized that I couldn't stop staining or else I would be stuck in the same boat as I was here so I knew I had to just keep going. I took my rag, wiped off the stain from my legs, ladder and carpet and kept going.... FYI.. It took me 2 showers of HARD scrubbing with a loofa to get it off my skin.... NOT FUN! Need less to say, my pants went into the garbage after that!

But here is how it turned out in the end.


This is a lighter and warmer color than I used in my house but it is a nice color for a room that doesn't get much light..... SPEAKING of light.... this little window in the picture above is getting an OVERHAUL!!! We are very excited! We have decided to rip this window out and replace it with a larger window so that we can get more light and see the AMAZING backyard my parent's have (I will show you that another day)

Now I'm not finished with the walls yet since I ran into another issue. I went to go stain the wall above the stairs and it turned out the my stairs ladder doesn't work on these stairs since they are shorter and steeper.... So... I have to rig something up that is not what I would call SAFE by all means but I don't know what else to do.

I am going to stretch my big ladder across the stairs opening, lay a board on it and put the smaller, lighter ladder on top of that. I told my husband that he had to be there watching me for safety sake... so I haven't done it yet........ SO, once again I will have to try and match up the stain but at least this time it is only about 8 inches.

Aren't you so glad that you have me to make all of the mistakes for you and that you can learn from mine....... I know seriously...... :)

I forgot to mention, my mom came up shortly after I spilled everything and just started laughing (after her jaw dropped)!!! It is a good thing we were planning on replacing the nasty purple carpet already. I'm glad my mom has a sense of humor :)

Friday, October 9, 2009

Questions & Answers

I get asked questions on my comments and I figure the best way for me to answer them is to do a post of all of the questions that I get for the week. So if you have asked me a question, check back here on FRIDAYS to see what my answer is.

Also, if you do have a question for me, can you please EMAIL it to me instead of leaving it under the comments section of that post? Sometimes I may not see the comment and won't get your question answered. Send me an email to budgetdesigngirl@gmail.com and if your question is about a certain project, leave me the title of the post.

Now, onto this weeks questions!

*What kind of stain did I use to stain (glaze) my walls? What prep work did I do?

I did absolutely NO prep work people!!! I can't explain to you how incredible simple this is. My walls were painted a very simple light tan already when it was built and I just went straight over it as it was. I didn't even wipe it down, I didn't want to take the time to do that. In my living room, I did paint one wall before I glazed over it because I wanted an accent color. I painted this wall 2 days before I stained over it to give it a curing period. (This wall did take a little longer to dry after I stained it, just so you know) Don't be surprised if your wall is still a bit tacky for a few days.

The stain that I used was an OIL STAIN by Minwax. Here is the thing with the stain..... I am sure you can use water base stain and it would turn out fine. If you are afraid of doing this and it is a big step for you, I actually would probably use water base and here's why... If you use an oil base and want to paint over it, you will more than likely have to use an oil base primer over it before you can repaint your walls! I don't think that a water base paint will adhere to an oil base stain. But, I don't know if you will get the sheen with a water base as you will with the oil base. The oil base I used was also a sealant so I have a beautiful sheen to mine and I believe it is more durable on your walls than a water base.

An IMPORTANT note on Oil Base vs. Water Base..... Oil base is VERY smelly!!!!! When I stain my house, I open up all of the windows surrounding the area and then we avoid that room like the plague. When I did my master bedroom, we went and stayed at my parent's house one night and then slept in the spare bedroom another night just to be safe. Make sure that you wear a mask when doing this and that you wear gloves to protect your skin so that it doesn't get into your pores.

So..... now that you know the pros and cons of each, you decide what works best with you.


*What is KSL?

I have mentioned this before, but for those who have just recently started following this blog, KSL is a local classifieds website that you can buy/sell pretty much anything you want. I have an addiction to it, I buy and sell stuff on here all the time. You can find some amazing deals, you just have to be patient waiting to find that perfect deal. F.Y.I....I live in Utah, so this is a local website for Utah, Idaho, and Wyoming.

This could actually be compared to Craigslist, but I don't like Craigslist as much as KSL. If you live in another state, check around to see if you have something similar to this in your area.


*How do I work (mainly paint) on my home with a baby?

For those who don't know, I have a 13 month old daughter and I am 6 1/2 months pregnant with my second daughter. (If you find me talking about Kenidi in any of my posts, that is my daughter on the way). This is definitely not an easy task but I get A LOT of support and help from my husband (and mom).

Everything that I do is in sections. I pick a small area that I can work on either in an evening or on a Saturday morning. My daughter goes down around 7:30 for bed, so I usually will try and paint a small area while she is sleeping. (lighting isn't always the greatest but I haven't had a problem so far, also, it goes much faster if you can get your husband to help you :)
If I need to STAIN a little bit larger area, my husband will take my daughter out and run errands or go for a hike on a Saturday morning or my mom will take her on a day that she doesn't have anything going on. On days that I stain, I keep my daughter out of the house ALL DAY just to be safe that she isn't breathing anything toxic. When I paint, I keep her away from it but I'm not as worried about the paint as I am the stain.

I definitely couldn't do what I do around the house without the support of my husband and my mom, but I am bound and determined to get every room painted and stained the way that I want it before I have my second little one. I can do the decorating with a little one, but it would almost be impossible to get the walls done the way that I want with a newborn.


Wednesday, September 2, 2009

What NOT to do!!!!

On the glazing video clip I made, I mention to not stop once you have started a room or the section you are doing. Last saturday I decided to glaze my bedroom, I went and bought some more stain because I new I was low, but I didn't think that I needed that much extra so I bought a small container...... Well.... I ran COMPLETELY out! I thought I could make it to the corner and I couldn't. I was scraping the bottom trying and this is what happened!
Here is a picture with no flash. The particles or fillaments were on the bottom and it made it super dark, so when it came to trying to blend it together, there was no way to make it look good. I am so bummed!
Here it is with a flash. It is amazing how bad it is. James and I have decided that from those corners you see in the picture, we are going to repaint and then just reglaze that section. I didn't do it on purpose, but I told everyone not to do it and then it happened to me the next day. If you notice you are getting low, stop in a corner and wait until you can get more stain. Blending in a corner isn't as nearly noticable as in the middle of a wall!

Friday, August 28, 2009

Glazing Technique & Faux Finishes

Once you have taken the step to adding color to your walls, why not take the next step and do a faux finish over it? I have posted a few different faux finishes that you could try in your house. All of the pictures don't do any of these techniques justice.

I posted this picture earlier but I wanted to explain how we did it. It is really hard to tell from the picture, but it really is cool in person.
-First we painted the wall with a few coats in red.
-Second, we took a sponge, textured roller and rolled yellow over the wall in straight lines down the wall.
-Third, we put latex gloves on and smeared an orange color around on the wall very speratic.
-Then lastly, we rolled back over everything with the red paint once again. The red doesn't cover completely so the yellow and orange just barely show through and creat this effect.

These next 2 pictures are of my sister's house. She did this Leather technique in her basement and it turned out awesome.
-First she painted the wall a burnt orange color.
- Next, she took some wood stain and painted an 18"x18" square with the stain and then pressed a plastic bag flat against it and then pulled it off. You need to blot the bag where the squares meet so that it doesn't look like a patchwork quilt.

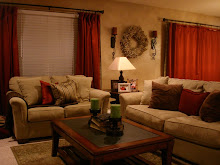
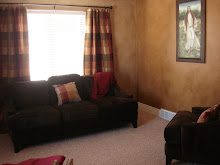
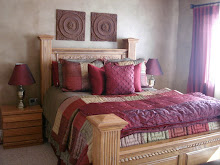
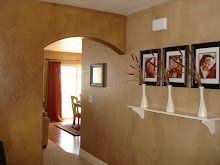
I have had a lot of people wanting to know how I glazed or stained my walls, so I decided to make a video clip of me doing it in my house to show you how. This technique is such a cheap way to make your house look FABULOUS! All it costs is a quart of stain which costs about $7, some painter's tape and cotton rags. One quart of stain can do a whole house or more! It goes a long way so it is definitely worth the little bit of money and elbow grease :)

The video was to large to post straight on the blog, so here is the link to watch it. http://www.youtube.com/watch?v=SYe1H-kI_ys


Related Posts with Thumbnails