Showing posts with label glazing. Show all posts

Monday, September 28, 2009

Living Room Update

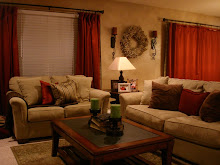
I have been busy working on my living room and I wanted to update you with what I have done so far. I knew in this room that I wanted an accent wall so I needed to start there. I didn't really have anything to go off of for colors so I decided to find the drapes that I liked and go from there. I don't recommend doing this, but I went straight to Target and found the drapes that I wanted (I just bought one for color matching at this point) and drove straight over to Home Depot and picked out my accent color in the store. I got lucky and it worked, but it is definitely better to pick your colors in the room to make sure that the lighting doesn't change the color on you.
Here is the drapery panel and the accent color that I chose to paint. Of course I wasn't just going to stop there! I painted this wall on a Thursday night, let it dry for 2 days, then I glazed (stained) the entire room!
Here is the wall before I glazed......
Here it is after I glazed!
You can see that it isn't a huge difference in color, but the drapes are what tie everything together.
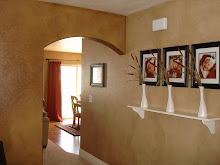
This picture shows how great the wall color looks with the drapes and my Christ picture.
Here is the glaze just over my walls like I have done in the rest of my main level.

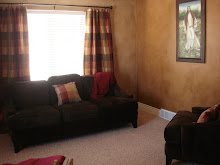
So I have to talk about this chair.... I call this my "funny" chair. I found this chair on KSL for $10... yes that is right, $10! I sent my husband to go pick it up and he was a little unsure about it. Anyone who knows me, knows that my style tends to lean more on the clean line side... I consider my style to be Clean Line Traditional, some may consider it Transitional. Anyway, this chair is not what people are used to seeing me pick out. I saw this and thought that I just had to get my hands on it. The fabric is in REALLY great condition considering how old this chair has to be. I think I will keep the fabric on it because it surprisingly goes quite well with the drapes, but the wood color is bothering me. I have decided that I am going to sand the wood down and stain it a dark color. I will put a throw pillow on it and I will have the best, cheapest chair I could have asked for in this spot.

Here is the real color of the fabric, the other pictures had a flash and it made it really shiny looking when it isn't like that in person. Some people may have a hard time having 2 different chairs like I have in this room, that is ok, but it is also ok to mix chairs in a room. I wanted something a little bit different than my usual in this room and I wanted it to be a bit more formal. As you can see, I still have a lot to do in this room, but I am really excited about the direction it is going and I am even more excited about how inexpensive it has been.

Wednesday, September 2, 2009

What NOT to do!!!!

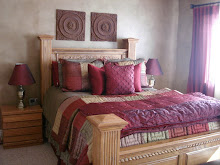
On the glazing video clip I made, I mention to not stop once you have started a room or the section you are doing. Last saturday I decided to glaze my bedroom, I went and bought some more stain because I new I was low, but I didn't think that I needed that much extra so I bought a small container...... Well.... I ran COMPLETELY out! I thought I could make it to the corner and I couldn't. I was scraping the bottom trying and this is what happened!
Here is a picture with no flash. The particles or fillaments were on the bottom and it made it super dark, so when it came to trying to blend it together, there was no way to make it look good. I am so bummed!
Here it is with a flash. It is amazing how bad it is. James and I have decided that from those corners you see in the picture, we are going to repaint and then just reglaze that section. I didn't do it on purpose, but I told everyone not to do it and then it happened to me the next day. If you notice you are getting low, stop in a corner and wait until you can get more stain. Blending in a corner isn't as nearly noticable as in the middle of a wall!

Friday, August 28, 2009

Glazing Technique & Faux Finishes

Once you have taken the step to adding color to your walls, why not take the next step and do a faux finish over it? I have posted a few different faux finishes that you could try in your house. All of the pictures don't do any of these techniques justice.

I posted this picture earlier but I wanted to explain how we did it. It is really hard to tell from the picture, but it really is cool in person.
-First we painted the wall with a few coats in red.
-Second, we took a sponge, textured roller and rolled yellow over the wall in straight lines down the wall.
-Third, we put latex gloves on and smeared an orange color around on the wall very speratic.
-Then lastly, we rolled back over everything with the red paint once again. The red doesn't cover completely so the yellow and orange just barely show through and creat this effect.

These next 2 pictures are of my sister's house. She did this Leather technique in her basement and it turned out awesome.
-First she painted the wall a burnt orange color.
- Next, she took some wood stain and painted an 18"x18" square with the stain and then pressed a plastic bag flat against it and then pulled it off. You need to blot the bag where the squares meet so that it doesn't look like a patchwork quilt.

I have had a lot of people wanting to know how I glazed or stained my walls, so I decided to make a video clip of me doing it in my house to show you how. This technique is such a cheap way to make your house look FABULOUS! All it costs is a quart of stain which costs about $7, some painter's tape and cotton rags. One quart of stain can do a whole house or more! It goes a long way so it is definitely worth the little bit of money and elbow grease :)

The video was to large to post straight on the blog, so here is the link to watch it. http://www.youtube.com/watch?v=SYe1H-kI_ys


Related Posts with Thumbnails